 Anacortes Siding
 Why Mount Vernon's Climate Is Hard on Siding
Mount Vernon sits in the Skagit Valley, close enough to the water that homes here deal with the same marine-influenced weather pattern that shapes the whole Anacortes service area: salt-tinged air moving in off the Sound, long stretches of driving rain through fall and winter, and short, low-angle winter sun that leaves shaded walls damp for days at a time. That combination is exactly what breaks down siding that isn't built or installed for it. Moisture doesn't have to be dramatic to cause damage — it just has to sit against a wall long enough, over enough winters, for the material underneath to start failing.
The most visible sign in this area isn't rot or paint failure, at least not at first. It's moss and green algae staining, especially on north-facing walls, under eaves, and anywhere landscaping or trees keep a wall shaded and slow to dry. Moss itself isn't usually what destroys siding, but it's a marker: wherever moss is thriving, moisture is lingering longer than it should, and lingering moisture is what eventually gets past seams, fasteners, and trim joints that weren't detailed correctly in the first place.
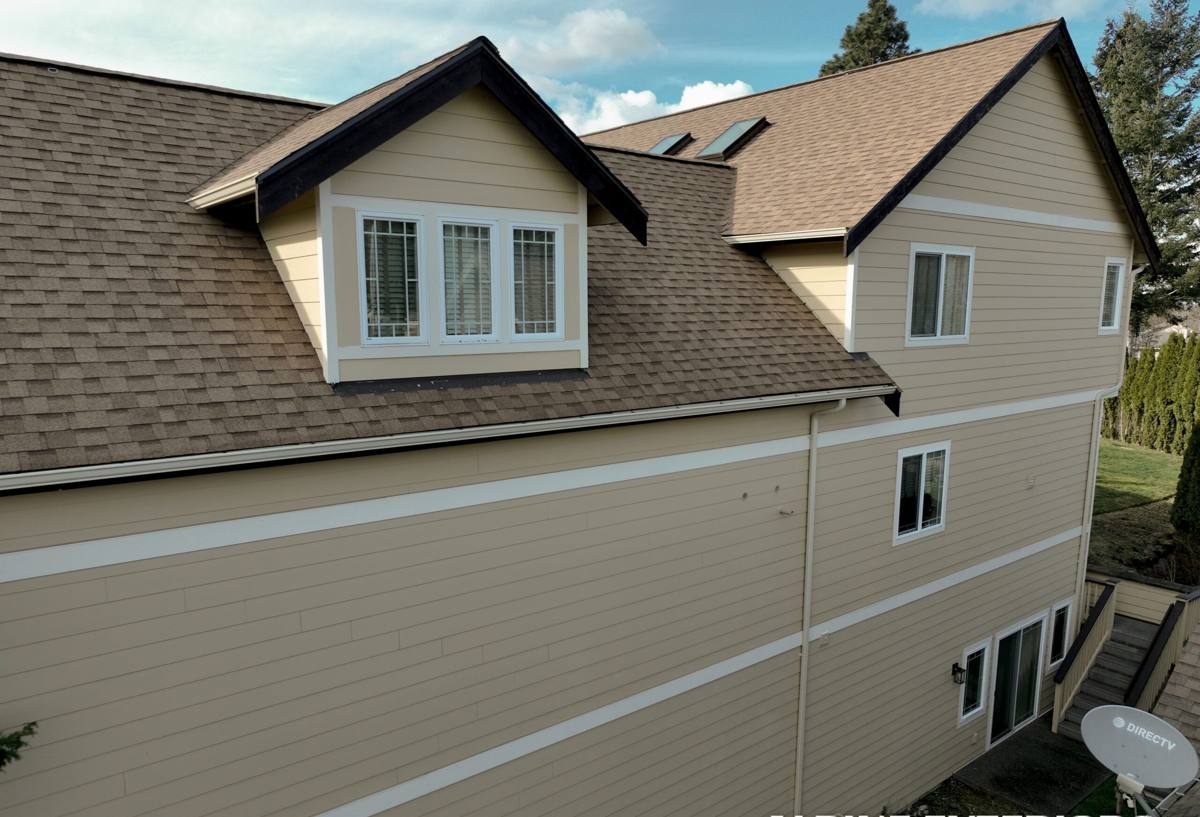
What Fiber Cement Siding Needs to Get Right in This Climate
Moisture Management, Not Just Moisture Resistance
Fiber cement itself is a dense, cement-and-cellulose material that doesn't rot, delaminate, or feed insects the way wood-based siding can. But the material is only half the story. In a climate that stays wet for months at a stretch, how the siding is installed — the drainage plane behind it, the clearances at the bottom, the way seams and trim are sealed — matters as much as what the siding is made of. Siding that's caulked tight everywhere instead of allowed to drain will trap water behind it, and fiber cement that's kept constantly wet will eventually show the same problems as any other material installed wrong: swelling at cut edges, cracked caulk joints, and finish failure.
Factory Finish vs. Field Paint
We install James Hardie siding with its ColorPlus factory finish rather than primed board that gets painted on-site. The finish is baked on in a controlled factory environment in multiple coats, which gives it better adhesion and UV resistance than a field-applied paint job can match, and it's backed by its own finish warranty. In a climate where a field-painted surface is fighting rain and humidity for half the year just to cure properly, starting with a factory-cured finish removes one entire point of failure before the crew ever shows up.
What a Correctly Installed Job Involves
Fiber cement siding is unforgiving of shortcuts. It's a heavier, denser material than vinyl or engineered wood, and it has specific installation requirements around clearance, fastening, and joint treatment that James Hardie publishes and that a competent crew follows on every wall, not just the ones that are easy to reach.
Clearances and Drainage
Siding needs consistent clearance from grade, roof lines, decks, and any horizontal flashing so water has somewhere to go instead of wicking straight into the bottom edge of a board. This is one of the most commonly skipped details on rushed jobs, because it slows the crew down — and it's one of the first things we check when we're asked to look at a home with siding problems.
Fastening and Joints
Fasteners have to land in the right location relative to the board edge and framing, driven flush without overdriving or leaving them proud. Butt joints and trim junctions need to be treated as part of the water management system, not just cosmetically closed with a bead of caulk. Caulk is a backup, not the primary defense — a wall that depends on perfect, permanent caulk to stay dry is a wall that will eventually leak.
Cut Edges and Field Sealing
Every field cut exposes raw material that isn't factory-finished. Those edges need to be sealed before the board goes up, and that step gets skipped constantly on jobs where the crew is moving fast. It's a five-minute detail per cut that determines whether that joint holds up through a decade of Skagit Valley winters or starts absorbing water in year two.
- Correct clearance maintained from grade, roofing, and horizontal surfaces
- Weather-resistant barrier installed and lapped correctly before any siding goes up
- Fasteners placed per manufacturer spacing and depth, not just "close enough"
- Butt joints and trim treated as water-management details, not just cosmetic gaps
- Raw cut edges field-sealed before installation, not left exposed
- Flashing integrated at windows, doors, and roof intersections, not bridged with caulk
Our Process for Mount Vernon Siding Projects
We run the same disciplined process on every fiber cement job, whether it's a full re-side or a repair on an existing Hardie installation.
- Assessment. We walk the exterior, note problem areas — shaded walls with moss buildup, low-clearance sections, existing water damage — and check what's underneath the current siding before quoting anything.
- Tear-off and substrate check. Old siding comes off and we inspect the sheathing and framing underneath for rot or existing moisture damage before covering anything back up.
- Weather barrier installation. A proper weather-resistant barrier goes on and is lapped correctly at every seam, window, and penetration — this is the layer doing the real waterproofing work, with the siding as the outer shield.
- Siding installation to spec. Boards go up with correct clearances, fastening, and joint treatment, following James Hardie's published installation requirements rather than a generic "how siding usually goes on" approach.
- Trim, flashing, and sealant details. Flashing gets integrated at every transition point, and sealant is used where it belongs — as backup, not as the primary water seal.
- Final walkthrough. We check clearances, fastener lines, and joint treatment before calling the job done, not just from the ground but up close.
Common Problems We See From Improper Installation
A lot of the fiber cement siding calls we get in the Mount Vernon and broader Skagit County area aren't material failures — they're installation shortcuts finally catching up with a home. The most frequent issues: siding installed with no clearance at grade or against a deck, so the bottom edge sits in standing water after every rain. Caulk used to close gaps that should have had proper flashing or overlap instead. Fasteners overdriven through the board face, cracking the material and creating an entry point for water. And cut edges left unsealed, which shows up years later as swelling or finish failure right at the seams.
None of these are defects in fiber cement as a product. They're the result of a crew treating a dense, precise material like it installs the same way as vinyl or engineered wood lap siding — it doesn't, and in a climate that stays wet as long as this one does, those shortcuts show up faster than they would somewhere dry.
How Fiber Cement Compares in a Wet, Mossy Climate
Homeowners in the Mount Vernon area often ask how fiber cement stacks up against other siding materials specifically for moisture and moss resistance, since that's the recurring problem locally.
| Material | Moisture Behavior | Moss/Algae Staining | Finish Longevity |
|---|---|---|---|
| James Hardie fiber cement | Doesn't rot or swell from surface moisture; performance depends on correct installation | Factory finish resists mildew growth better than field paint; still needs airflow to stay dry | Factory ColorPlus finish, backed by its own warranty |
| Engineered wood siding | Wood-based core is more vulnerable to swelling if moisture reaches the edges or a coating fails | Comparable staining risk on shaded walls | Typically field- or factory-painted; edge sealing is critical |
| Vinyl siding | Doesn't absorb water, but can trap moisture behind it and isn't rigid enough for some detailing | Can stain and is harder to clean without damaging the surface | Color is through the material but fades and becomes brittle over time |
| Cedar or primed wood | Most vulnerable to sustained moisture; needs consistent maintenance to hold up here | Highest staining and moss risk of the group without regular upkeep | Requires ongoing painting or sealing to keep protecting the wood |
This is part of why our company installs only James Hardie fiber cement. We've made the call that in a climate like this one, the combination of a non-combustible, moisture-stable material with a factory finish gives homeowners the best odds of siding that still looks and performs well a decade or two out, without asking them to maintain it constantly to get there.
What Affects the Cost of a Fiber Cement Siding Job
| Factor | Why It Matters |
|---|---|
| Substrate condition | Rot or water damage found under old siding adds repair work before new siding can go on correctly |
| Home size and wall complexity | More corners, trim details, and cutouts mean more labor and material waste |
| Siding profile and accessories | Lap widths, trim boards, and soffit or fascia work all affect material cost |
| Access and site conditions | Multi-story walls, tight lot lines, or landscaping close to the house affect scaffolding and crew time |
| Tear-off scope | Full removal of old siding down to the sheathing costs more upfront but avoids covering existing problems |
We walk every home before quoting, because a rough per-square-foot number without seeing the actual walls, trim, and substrate condition isn't a real estimate — it's a guess.
Caring for Fiber Cement Siding in the Skagit Valley
Correctly installed fiber cement is low-maintenance, not maintenance-free. A little seasonal attention goes a long way toward keeping it performing the way it's supposed to in a climate this wet.
- Rinse siding periodically, especially shaded and north-facing walls where moss and algae tend to establish first
- Keep gutters clear so overflow isn't running directly down a wall section during heavy rain
- Trim back landscaping and tree limbs that keep a wall shaded and slow to dry between storms
- Check caulking at trim and joints periodically and have it touched up before it fails completely
- Have any impact damage or cracked boards repaired promptly rather than left to let moisture in
Why a Local Crew Matters for a Mount Vernon Job
Siding installation isn't a job where distance is neutral. A crew that works the Anacortes and greater Skagit County area regularly has already seen how this specific climate treats siding over years, not just in a training manual. That shows up in small decisions on the job — where extra flashing attention matters, which wall orientations need the most careful joint treatment, how much clearance to leave given what heavy regional rain actually does at grade level over time.
It also matters after the job is done. Warranty callbacks, a caulk line that needs a look after the first hard winter, a question about a trim detail — those are easy to handle for a crew that's still working in the area and isn't a two-hour drive away. We stand behind our installation work specifically because we're not disappearing after the last panel goes up.
If you're planning a siding project in Mount Vernon or elsewhere in the Anacortes service area, we're happy to come take a look, walk the exterior with you, and put together a free, no-pressure estimate based on what your home actually needs.