 Anacortes Siding
 Burlington Windows Have to Work Year-Round, Not Just on Sunny Days
Burlington sits inland from Fidalgo Island and Anacortes, but it shares the same weather system that defines this whole stretch of Skagit County: long stretches of driving rain off Puget Sound weather fronts, damp shaded yards that grow moss on anything that sits still, and humidity that never fully lets up between fall and spring. Windows here aren't just letting in light — they're the single biggest gap in a home's weather barrier, and a poorly installed one will show it within a season or two.
We're based out of Anacortes and work Burlington regularly, so we see the same failure patterns over and over: windows that were caulked instead of properly flashed, trim that was never back-primed before install, and openings where the water-resistive barrier was cut and taped in a way that actually directs water into the wall instead of away from it. None of that is visible on install day. It shows up eighteen months later as a soft spot under the sill or a musty smell in a bedroom corner.
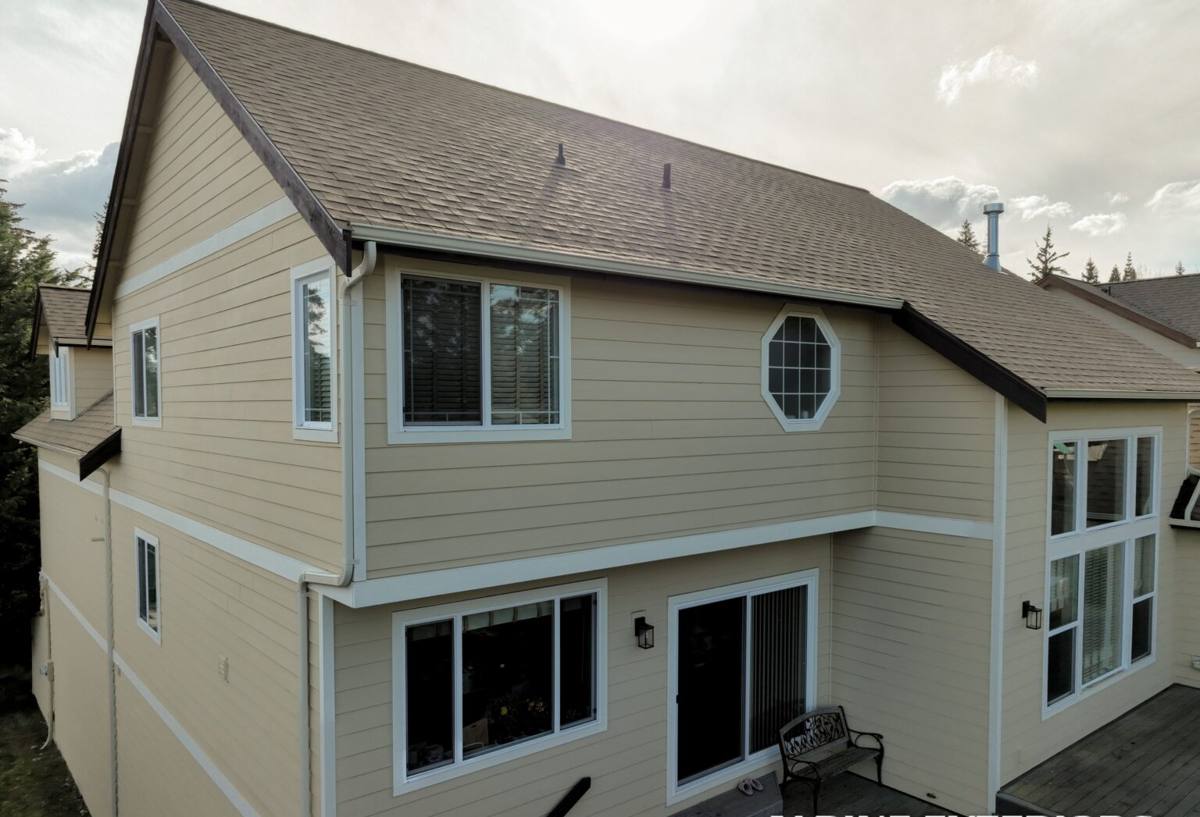
Signs a Burlington Home's Windows Are Losing the Fight
Most homeowners don't think about window condition until something is obviously wrong, but there are earlier warning signs worth catching first.
- Condensation between the panes (a failed seal, not a cleaning problem)
- Visible daylight or a draft you can feel around the frame when it's windy
- Wood trim that's soft, discolored, or growing a green or black film
- Windows that are difficult to open, close, or lock properly
- A musty smell near the window that comes and goes with the weather
- Paint or caulk cracking and separating from the frame within a year or two of being applied
- Visible moss or algae growth on the sill or exterior casing
Any one of these on its own might just mean a window needs caulking or a hardware adjustment. Several of them together, especially condensation plus soft trim, usually means water has already gotten past the surface and into the wall assembly.
What a Correct Window Installation Actually Involves
Window installation looks simple from the outside — remove the old unit, set the new one, trim it out. The part that actually determines whether the window lasts is mostly invisible once the job is done.
Opening Prep and Removal
Once the old window is out, we inspect the rough opening before anything new goes in. Sill condition, framing moisture, and the state of the existing water-resistive barrier all get checked. This is the point where hidden rot or old water damage gets found — and it's much cheaper to deal with now than to seal a new window over a problem and have it resurface later.
Flashing and Water Management
This is the step that actually keeps water out, and it's the one most often shortcut. A correct install uses sill pan flashing at the bottom of the opening, integrates properly with the house wrap or building paper at the sides and top, and is layered so water is shed downward and outward — never trapped behind the window or directed into the framing. Caulk is a backup, not the primary defense. If flashing is the only thing keeping water out, that's a sign of a rushed job.
Setting, Leveling, and Fastening
The new window has to be plumb, level, and square before it's fastened — even a slight rack in the frame puts stress on the sash and shortens the life of the seals and hardware. We shim and fasten according to the manufacturer's instructions for that specific window line, since fastening patterns affect both structural performance and warranty coverage.
Insulation and Air Sealing
The gap between the window frame and the rough opening gets filled with a low-expansion foam or backer rod and sealant rated for that gap size — never packed tight with fiberglass insulation alone, which does little to stop air movement. This step is what actually eliminates the draft homeowners feel around old windows.
Trim and Finish Work
Interior and exterior trim gets back-primed on cut ends before install and caulked at the joints, not just painted over gaps. This is a small step that's easy to skip and is usually the first thing to fail when it's skipped — you'll see it as peeling paint or a gap opening up at a miter joint within a year.
Choosing Materials for a Climate Like This
Not every window product handles a wet, moss-prone climate the same way. We steer homeowners toward materials that hold up with minimal maintenance rather than ones that look good on day one but demand upkeep every year.
| Material | How It Handles This Climate | Maintenance |
|---|---|---|
| Vinyl | Won't rot, doesn't need paint, handles moisture well; good value for most homes | Low — occasional cleaning |
| Fiberglass | Very stable in temperature swings, strong, holds paint well if a color change is wanted later | Low |
| Wood-clad | Warmer look inside; the exterior cladding protects the wood, but any breach in that cladding lets moisture reach bare wood | Moderate to high — depends on cladding integrity |
| Bare wood | Traditional look, but exposed wood in constant damp and moss conditions needs consistent repainting and sealing to avoid rot | High |
We're honest with clients about this trade-off: a bare wood window can be beautiful, but in a climate with this much sustained moisture and moss growth, it only performs as well as the maintenance schedule behind it. For most Burlington homes, vinyl or fiberglass gives the best balance of performance and low upkeep, with wood-clad reserved for homeowners who specifically want that interior wood look and are prepared to keep an eye on the exterior cladding.
Glass Packages and Performance Options
The frame material is only half the equation — the glass package matters just as much for comfort and energy use in a marine climate.
- Double-pane with Low-E coating and argon fill is the standard for most replacement projects and performs well against both heat loss and summer glare
- Triple-pane adds another layer of insulation and sound dampening, worth considering on north-facing rooms or homes near busier roads, though it comes at a higher cost and added weight
- Tempered glass is required by code in certain locations — near doors, low to the floor, in bathrooms — and we account for that during the quote, not as a surprise change order later
- Grid and grille patterns are a style choice, not a performance one, but they do affect cleaning and should match the home's existing character
Our Installation Process, Start to Finish
- On-site walkthrough of every opening being replaced, checking rough opening size, sill condition, and any visible moisture history
- Measurements and product selection, matching frame material and glass package to the specific exposure of each opening — a north wall and a rain-facing wall don't always need the same spec
- Written estimate covering materials, labor, and a realistic timeline before any work is scheduled
- Removal of the old window and inspection of the opening for hidden rot or framing issues, addressed before the new window goes in
- Flashing, setting, insulating, and trimming the new window using the steps above
- Final walkthrough with the homeowner, testing operation and checking seals before we consider the job done
What Window Installation Costs and What Drives the Price
Every home and every window opening is different, so we won't quote a number without seeing the job — but the factors that move price around are consistent across most Burlington projects.
| Factor | How It Affects Cost |
|---|---|
| Full-frame vs. insert replacement | Full-frame costs more but is necessary when the existing frame is damaged or the opening needs correction |
| Frame material | Vinyl is typically the most budget-friendly; fiberglass and wood-clad run higher |
| Glass package | Triple-pane and specialty coatings add cost over standard double-pane Low-E |
| Hidden rot or framing damage | Found and repaired during removal; adds cost but prevents a repeat failure |
| Number of openings and access | Second-story windows and homes with many openings take longer per unit |
| Trim and finish scope | Custom trim profiles or matching existing woodwork adds labor time |
Why a Crew That Already Works Burlington Matters
Anacortes-based crews who serve Skagit County regularly, including Burlington, see the same climate stress patterns across dozens of homes a year — the driving rain that comes in at an angle during winter storms, the shaded lots where moss and algae build up fastest, and the humidity swings that make flashing detail work non-negotiable rather than optional. That repetition matters. A crew that installs windows in this specific climate week after week isn't guessing at flashing details or hoping the caulk holds — they've already seen what fails and what doesn't, and they build accordingly.
It also means faster, more accurate estimates. We're not learning the area's building stock or common framing issues on your job; we've already seen the range of what's typical in Burlington and the surrounding Skagit County communities, so the quote reflects the real scope, not a generic estimate that changes once we open the wall.
Living With New Windows Through Moss Season
A correctly installed window is close to maintenance-free, but a few habits keep it that way through Skagit County's long damp stretch.
- Rinse sills and exterior trim periodically to keep moss and algae from establishing on the surface
- Keep gutters clear so overflow doesn't run down directly over window openings
- Check exterior caulk lines once a year, ideally before the wet season starts in fall
- Trim back vegetation that keeps a window shaded and damp for extended periods, since that's exactly the condition moss needs to take hold
- Open windows periodically in drier stretches to let interior humidity balance out
None of this is heavy maintenance — it's the kind of light upkeep that, paired with a correctly installed window, keeps the whole assembly performing for decades instead of years.
Ready to Talk About Your Windows?
If your Burlington home has windows that are drafty, fogging between the panes, or showing soft or discolored trim, it's worth having a local crew take a look before the next wet season sets in. We'll walk the openings, tell you honestly what's going on, and put together a straightforward estimate with no pressure to sign anything on the spot. Use the form below to request your free estimate.