 Anacortes Siding
 Flounder Bay sits along the water on Fidalgo Island, and the same waterfront setting that makes it a desirable place to live also makes it one of the tougher spots in Skagit County to keep exterior siding performing the way it should. Salt-laden air, wind-driven rain coming straight off the water, and a moss season that can run most of the year all work against whatever's on the wall. We install siding throughout Anacortes, and Flounder Bay is one of the areas where getting the installation details right — not just picking a good material — is what separates siding that holds up for decades from siding that starts showing problems within a few years.
What Flounder Bay's Climate Does to Siding Over Time
Waterfront and near-waterfront homes in this part of Skagit County take a different kind of weathering than homes a mile or two inland. Salt air accelerates corrosion on fasteners, flashing, and any material that isn't built to resist it. Wind off the water drives rain sideways into walls that would otherwise stay relatively dry, pushing moisture into seams, trim joints, and any gap where the installation wasn't detailed tightly. And because this area rarely gets a long stretch of dry, sunny weather, siding here spends more of the year damp than siding in drier parts of the state — which is exactly the condition moss, algae, and mildew need to take hold.
None of that means siding is doomed in Flounder Bay. It means the margin for error during installation is smaller here than it is elsewhere. A flashing detail that would probably be fine on a sheltered inland lot can turn into a real moisture problem on a wall that takes direct wind-driven rain year after year.
Signs a Flounder Bay Home Needs a New Siding Installation
- Visible cracking, warping, or delamination, especially on walls facing the water or prevailing wind
- Soft spots, staining, or a spongy feel near the bottom courses or around window and door trim
- Paint that's chalking, peeling, or needing repainting every few years despite regular upkeep
- Moss or algae that keeps coming back on shaded or north-facing sections no matter how often it's cleaned
- Gaps opening up at seams, corners, or trim joints from years of wet-dry cycling
- Rising energy bills that suggest the wall assembly behind the siding isn't performing as it should
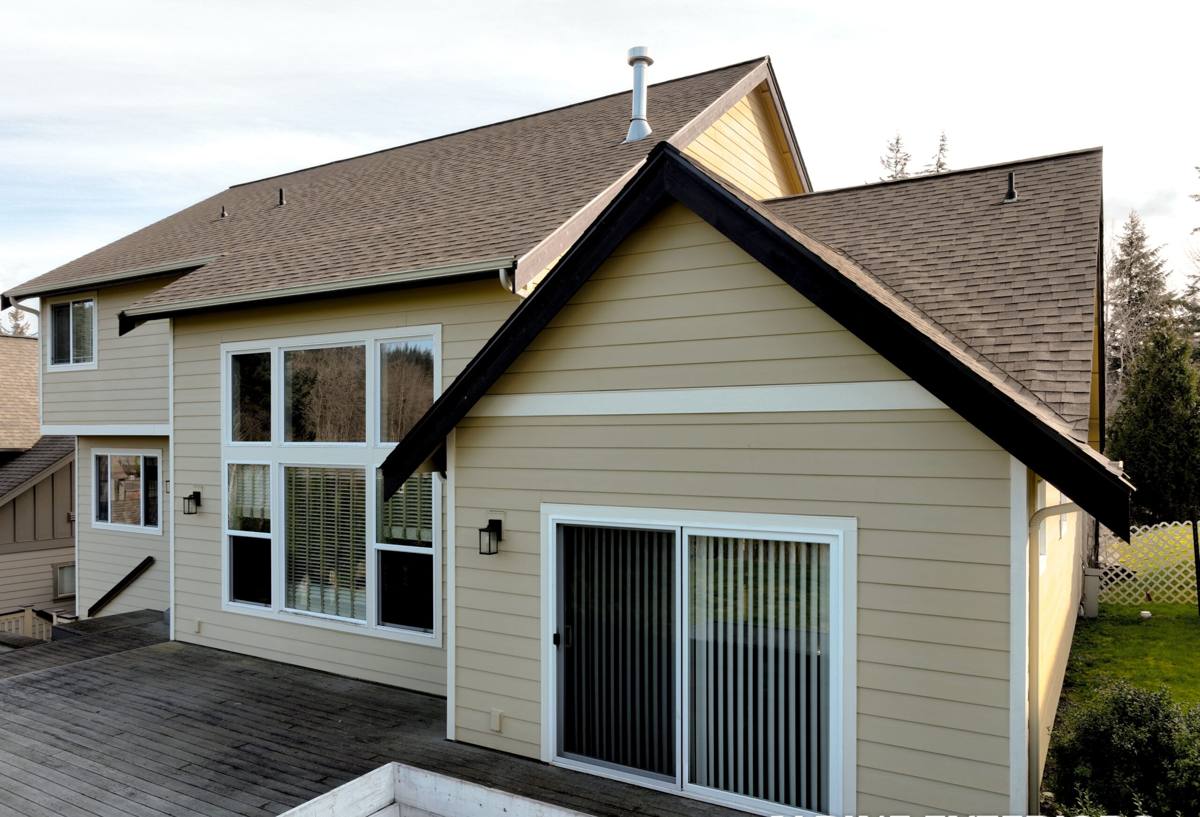
What a Correct Siding Installation Actually Involves
Siding installation isn't just fastening panels to a wall. The material only performs as well as the system behind it, and that system is where most long-term failures actually start — not with the siding itself, but with what's underneath it.
The Water-Resistive Barrier and Flashing Come First
Before any siding goes up, the wall needs a properly lapped water-resistive barrier and correctly integrated flashing at every window, door, deck ledger, and roof-to-wall intersection. On a home taking direct wind-driven rain off the water, this layer is doing more work than it would on a sheltered lot, so shortcuts here show up faster. We check that flashing laps the right direction, that penetrations are sealed properly, and that the barrier ties into the rest of the building envelope instead of just sitting behind the siding as an afterthought.
Fastening, Clearances, and the Details Homeowners Never See
James Hardie siding has specific fastening patterns, nailing zones, and clearance requirements from grade, roofing, and decks — and those specs exist because manufacturer testing shows what actually keeps water and wind from compromising the assembly. Clearance from grade and hard surfaces matters even more in a wet climate, since siding installed too close to the ground stays damp longer and is more prone to wicking moisture. Panel gaps, caulking at butt joints, and corner details all affect how the wall handles expansion, contraction, and moisture over time. None of this is visible once the job is finished, which is exactly why it has to be done right the first time.
Why We Install Only James Hardie Fiber Cement Here
We install one siding product across every job we take on, including in Flounder Bay: James Hardie fiber cement. It's non-combustible, dimensionally stable, and factory-finished with Hardie's ColorPlus coating, which is engineered to resist fading and cracking under sustained UV and salt exposure rather than relying on a field-applied paint job that will need redoing every few years. For a property that sits in direct line of salt air and driving rain, that combination matters more than it would somewhere drier and further from the water.
Hardie also builds climate-engineered HZ product lines specifically for wetter, harsher exposure zones like ours, and backs its material with a strong, transferable warranty — something worth having on a home that may change hands down the road. We don't install vinyl, LP SmartSide, Cemplank, Allura, primed spruce, or cedar. That's a standard we've settled on after years of seeing how different materials hold up in this specific climate, not a sales position.
| Hardie Product | Where It Fits on a Flounder Bay Home | Why It Works Here |
|---|---|---|
| HardiePlank Lap Siding | Primary field siding on most homes | Wide color and texture range, factory-finished against salt-air fading |
| HardiePanel Vertical Siding | Accent walls, gables, modern designs | Clean lines that pair well with lap siding on mixed-style homes |
| HardieTrim Boards | Corners, window and door surrounds, fascia | Won't rot or need repainting the way wood trim does in constant moisture |
| HZ10 Climate Engineered | Direct water and wind-exposed elevations | Formulated specifically for wetter, harsher coastal exposure zones |
Tear-Off vs. Installing Over Existing Siding
One of the first decisions on any installation is whether the existing siding comes off entirely or the new siding goes over it. In most cases on an older Flounder Bay home, we recommend a full tear-off. It lets us inspect the sheathing and framing underneath for hidden moisture damage — which is more common here than in drier parts of the county — and it lets us install a clean, properly lapped water-resistive barrier instead of building a new siding system on top of an old one that may already be trapping moisture. Installing over existing siding can sometimes work for a sound, dry wall assembly, but it's not something we'd do without confirming what's actually behind the current siding first. Guessing on that point is how moisture problems get sealed in rather than solved.
Our Siding Installation Process, Step by Step
- Inspection and estimate. We walk the exterior, note problem areas, and give you an honest read on what's driving the need for new siding — age, storm damage, or an installation issue from years ago.
- Tear-off and sheathing check. Old siding comes off and we inspect the sheathing and framing for rot or moisture damage before anything new goes up.
- Repairs, if needed. Any damaged sheathing or framing gets addressed before we move forward — building over a compromised wall just hides the problem.
- Water-resistive barrier and flashing. A new barrier is installed and properly lapped, with flashing detailed at every window, door, and penetration.
- Siding installation. Hardie panels or planks go up to manufacturer fastening and clearance specifications, with attention to the corners, seams, and trim details that determine how the wall performs over time.
- Trim, caulking, and finish work. Trim boards, corner details, and caulking are completed to give the exterior a finished look and seal out moisture at every joint.
- Final walkthrough. We go over the finished work with you, address any punch-list items, and make sure you understand the maintenance the new siding does — and doesn't — need going forward.
What Affects the Cost of a Flounder Bay Siding Installation
Every home is different, but a few factors consistently move the cost of a project up or down. We won't quote a number without seeing the property, but this gives a general sense of what shifts the estimate.
| Factor | Impact on Cost |
|---|---|
| Full tear-off vs. installing over existing siding | Tear-off costs more upfront but avoids building over hidden problems |
| Sheathing or framing repairs discovered during tear-off | Adds cost, but far cheaper than repairing rot after it spreads |
| Home size and wall complexity | More square footage, gables, and dormers mean more labor and trim |
| Trim and accent details (vertical panels, custom corners) | Adds material and labor cost but improves long-term durability and appearance |
| Site access | Steep lots, limited driveway space, or tree cover near the structure can affect staging and labor time |
Timeline and What to Expect During the Project
A full siding installation on an average-sized home typically runs a few weeks from tear-off to final trim, weather permitting — and weather is a real variable here, since we're not going to install a water-resistive barrier or run flashing details in the middle of a driving rainstorm. We plan around the forecast rather than pushing through it, because the whole point of a correct installation is keeping water out of the wall, and that starts with not building it in wet conditions in the first place. During the project, expect scaffolding or ladders around the home, some noise during tear-off and fastening, and a work area that gets cleaned up at the end of each day.
Why a Crew That Already Works in Flounder Bay Matters
Skagit County's coastal microclimates aren't uniform, and a waterfront community like Flounder Bay has its own particular mix of wind exposure, salt air, and moisture that's different from a sheltered inland lot even a few miles away. That's something you learn by working on homes here repeatedly — which elevations take the worst of a winter storm, where moss keeps coming back no matter what, and which flashing details actually matter versus which ones are just code minimums. It also means fewer surprises around site access, permitting, and the practical realities of working close to the water.
A crew that hasn't worked this area before isn't necessarily going to do a bad job, but they're starting from zero on the local knowledge that shapes how a project should be scoped and detailed. We'd rather bring that experience to the estimate than figure it out on your dime.
What to Expect From Your Estimate
- A walk-around inspection of your current siding, trim, and any visible moisture or damage issues
- An honest assessment of whether a tear-off or install-over approach makes sense for your home
- A clear explanation of why we recommend James Hardie fiber cement for this specific location and exposure
- A written scope and estimate, with no pressure to sign on the spot
If your Flounder Bay home has siding that's cracking, staining, holding onto moss, or just past its useful life, we're glad to take a look. Reach out for a free, no-pressure estimate — we'll give you a straight answer about what your home needs and why.